Keyboards are a ubiquitous part of our daily lives. Whether you’re using one on your computer, laptop, or even your smartphone, these devices tend to accumulate dirt, dust, and debris over time. A dirty keyboard not only looks unattractive but can also hinder your typing experience and even affect the overall performance of your device. In this blog post, we will guide you through the process of cleaning your keyboard easily, ensuring it stays in top-notch condition.
Why Cleaning Your Keyboard Is Important
Before we dive into the cleaning process, it’s essential to understand why keeping your keyboard clean is crucial. Here are some compelling reasons:
- Improved Performance: Dust and debris can interfere with the functioning of the keys, leading to sticky or unresponsive keys. Regular cleaning ensures smooth and efficient typing.
- Health and Hygiene: Keyboards can harbor germs and bacteria, posing health risks, especially if you share your computer with others. Regular cleaning helps maintain a hygienic workspace.
- Prolonged Lifespan: A well-maintained keyboard is likely to last longer, saving you the cost and hassle of replacing it prematurely.
- Aesthetic Appeal: Cleanliness matters, and a clean keyboard looks much better than a grimy one. It also leaves a positive impression in professional settings.
Now that we understand the importance of keeping our keyboards clean, let’s explore some easy and effective methods to achieve this.
1. Gather Your Cleaning Supplies
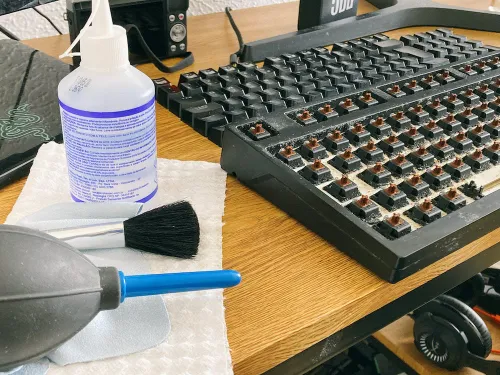
Before you start cleaning your keyboard, gather the necessary supplies. Here’s a list of what you’ll need:
- Isopropyl alcohol (70% or higher)
- Cotton swabs or Q-tips
- Microfiber cloth or lint-free cloth
- Compressed air canister (optional)
- A small brush (e.g., a soft paintbrush)
Ensure that you have all these items ready to make the cleaning process smooth and efficient.
2. Power Off and Disconnect
For safety reasons, it’s essential to power off your computer or disconnect the keyboard if it’s a separate device. This prevents accidental keypresses and ensures your safety while cleaning.
3. Remove Loose Debris
Hold your keyboard upside down over a trash can or a paper towel and gently tap it to dislodge loose debris like crumbs, dust, and hair. You can also use a can of compressed air to blow away stubborn particles stuck between the keys.
4. Cleaning the Keys
Now, it’s time to focus on cleaning the individual keys. Dip a cotton swab or Q-tip into isopropyl alcohol. Make sure it’s not dripping wet but damp enough to clean effectively. Wipe each key’s surface and the area around it. This will help remove dirt, oil, and grime that accumulate from your fingers.
5. Deep Cleaning Between Keys
To get rid of dirt and dust trapped between the keys, use a small brush like a soft paintbrush or a specialized keyboard cleaning brush. Gently brush between the keys to dislodge and remove debris.
6. Cleaning the Keyboard Base
The space beneath the keys can collect a lot of dust and dirt over time. To clean this area, take your compressed air canister (if available) and blow air between the keys. This will help remove any remaining loose particles.
7. Wiping Down the Keyboard Surface
Dampen a microfiber cloth or lint-free cloth with isopropyl alcohol. Gently wipe down the entire keyboard surface, including the areas around the keys and the palm rest. This step will not only clean the keyboard but also disinfect it, removing any germs or bacteria.
8. Let It Dry
After cleaning, allow your keyboard to air dry for a few minutes. Ensure it’s completely dry before reconnecting it to your computer or turning on your device.
9. Regular Maintenance
To keep your keyboard in top condition, consider performing this cleaning routine once a month or as needed. Regular maintenance will prevent the buildup of dirt and ensure a longer lifespan for your keyboard.
A clean keyboard not only enhances your typing experience but also contributes to a healthier and more pleasant workspace. By following the simple steps outlined in this guide, you can easily clean your keyboard and maintain its performance and appearance. Remember, regular maintenance is the key to a long-lasting and efficient keyboard, so make cleaning it a part of your routine. Your fingers and your device will thank you for it.

