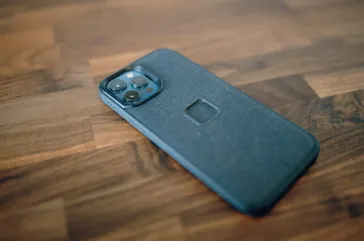
The iPhone is not just a communication device; it’s also a fashion statement for many. With a plethora of iPhone cases available in the market, it’s easy to find one that suits your style. However, sometimes you want something unique and personalized. That’s where do-it-yourself (DIY) iPhone case decoration projects come in.
In this article, we’ll explore 10 easy DIY iPhone case decoration projects that will allow you to customize your phone’s look and make it stand out from the crowd. Whether you’re a crafting novice or a seasoned DIY enthusiast, there’s a project here for you. Let’s dive in!
1. Decoupage Delight
Materials Needed:
- Clear iPhone case
- Mod Podge or clear glue
- Small paintbrush
- Magazine clippings, photos, or printed images
- Scissors
Instructions:
- Cut out images or patterns from magazines or print your favorite photos.
- Apply a thin layer of Mod Podge to the back of the image and stick it onto the inside of the clear iPhone case.
- Smooth out any air bubbles and allow it to dry.
- Apply a few more coats of Mod Podge over the image, letting each layer dry before adding the next.
- Once it’s completely dry, your decoupaged iPhone case is ready to use!
2. Washi Tape Wonder
Materials Needed:
- Plain iPhone case
- Washi tape in various colors and patterns
- Scissors
Instructions:
- Start by covering your plain iPhone case with strips of washi tape, mixing and matching colors and patterns as you go.
- Trim the excess tape with scissors to ensure a neat fit around the camera and buttons.
- Make sure the entire case is covered.
- Voila! Your washi tape-decorated iPhone case is ready to protect your phone in style.
3. Glitter Glamour
Materials Needed:
- Clear iPhone case
- Mod Podge or clear glue
- Fine glitter in your preferred color
- Paintbrush
Instructions:
- Apply a thin, even layer of Mod Podge to the back of the clear iPhone case.
- Sprinkle fine glitter over the Mod Podge while it’s still wet. You can use a paper plate to catch excess glitter.
- Let it dry, and then shake off any excess glitter.
- Apply a coat of Mod Podge over the glitter to seal it and let it dry again.
- Your sparkling glitter iPhone case is complete!
4. Nature-Inspired Elegance
Materials Needed:
- Clear iPhone case
- Dried flowers, leaves, or other small natural elements
- Mod Podge or clear glue
- Small paintbrush
Instructions:
- Arrange the dried flowers or leaves on the back of the clear iPhone case in your desired pattern.
- Apply a thin layer of Mod Podge over the back of the case.
- Gently press the natural elements onto the Mod Podge.
- Let it dry completely.
- Apply another layer of Mod Podge over the natural elements to seal them in place.
- Your nature-inspired iPhone case is now a work of art.
5. Colorful Fabric Wrap
Materials Needed:
- Plain iPhone case
- Fabric scraps in various colors and patterns
- Fabric glue
- Scissors
Instructions:
- Cut the fabric scraps into small pieces or strips.
- Apply fabric glue to the back of the fabric and adhere it to the plain iPhone case.
- Overlap the fabric pieces to create an interesting design.
- Trim any excess fabric around the camera and buttons.
- Allow the fabric to dry completely.
- Your fabric-wrapped iPhone case is ready to add a pop of color to your phone.
6. Resin Magic
Materials Needed:
- Clear iPhone case
- Epoxy resin kit (with resin and hardener)
- Resin dye (in your preferred color)
- Disposable cups and stirring sticks
- Disposable gloves
Instructions:
- Follow the instructions on the epoxy resin kit to mix the resin and hardener in a disposable cup.
- Add a few drops of resin dye to achieve your desired color.
- Carefully pour the colored resin into the clear iPhone case.
- Tilt the case to spread the resin evenly.
- Let it dry according to the kit’s instructions.
- Your unique resin-coated iPhone case is now a conversation starter.
7. Embroidery Extravaganza
Materials Needed:
- Plain iPhone case
- Embroidery floss in various colors
- Embroidery needle
- Pencil
Instructions:
- Use a pencil to lightly sketch a design or pattern on the plain iPhone case.
- Thread the embroidery needle with your chosen floss color and start stitching along the pencil lines.
- Experiment with different embroidery stitches to add texture and detail.
- Continue until your design is complete.
- Knot the thread securely on the inside of the case and trim any excess.
- Your hand-embroidered iPhone case is now a work of art.
8. Doodle Dreams
Materials Needed:
- Plain iPhone case
- Permanent markers in various colors
Instructions:
- Let your creativity flow by using permanent markers to doodle directly onto the plain iPhone case.
- You can create abstract designs, write inspiring quotes, or draw your favorite characters.
- Experiment with different colors and patterns until you’re satisfied with the result.
- There’s no right or wrong in doodling; it’s all about self-expression.
- Your one-of-a-kind doodled iPhone case is a reflection of your personality.
9. Sticker Style
Materials Needed:
- Clear iPhone case
- Decorative stickers or vinyl decals
Instructions:
- Select your favorite stickers or vinyl decals.
- Carefully peel and stick them onto the clear iPhone case in your desired arrangement.
- Press down firmly to ensure they adhere well.
- Make sure the stickers cover the entire case for a cohesive look.
- Your sticker-adorned iPhone case is an easy way to add flair to your phone.
10. Quirky Quilting
Materials Needed:
- Plain iPhone case
- Quilting fabric scraps
- Quilt batting (thin foam padding)
- Fabric glue
- Scissors
Instructions:
- Cut the quilting fabric scraps into small squares or rectangles.
- Apply fabric glue to the back of the fabric pieces and adhere them to the plain iPhone case.
- Cut a piece of quilt batting to fit inside the case and glue it in place.
- Add more fabric pieces to cover the batting and create a quilted effect.
- Allow the fabric and batting to dry completely.
- Your quilted iPhone case is both stylish and padded for extra protection.
With these 10 easy DIY iPhone case decoration projects, you have the creative
freedom to customize your phone’s look to match your style, mood, or any occasion. Whether you prefer the elegance of dried flowers or the sparkle of glitter, there’s a project for everyone. These projects also make fantastic gifts for friends and family, showcasing your personal touch and thoughtfulness.
Remember, the beauty of DIY projects lies in their uniqueness. Experiment with different materials, colors, and techniques to create iPhone cases that are as individual as you are. So, grab your crafting supplies, let your imagination run wild, and transform your iPhone case into a work of art that reflects your personality and creativity. Happy crafting!